Ansible Automation Platform + Service Now Integration
There are a couple of ways to integrate Ansible with Service Now - using the Ansible Spoke or the Controller API. I prefer the latter because the Spoke requires enterprise access to the integration hub and comes with limitations. Using the Ansible Spoke, you will benefit from a user-friendly setup, but the downstream step will always be a job template. If you are using Ansible extensively, then you will know that workflow templates are often desired when initiating a workflow from a ticketing system like Service Now. For this reason, I set out to document the process to setup the integration between Service Now and the Controller API.
This document covers the manual process - to see how you can use an Ansible playbook, check out my Autodotes post Using Ansible to Setup Service Now Integration.
Create Ansible Application
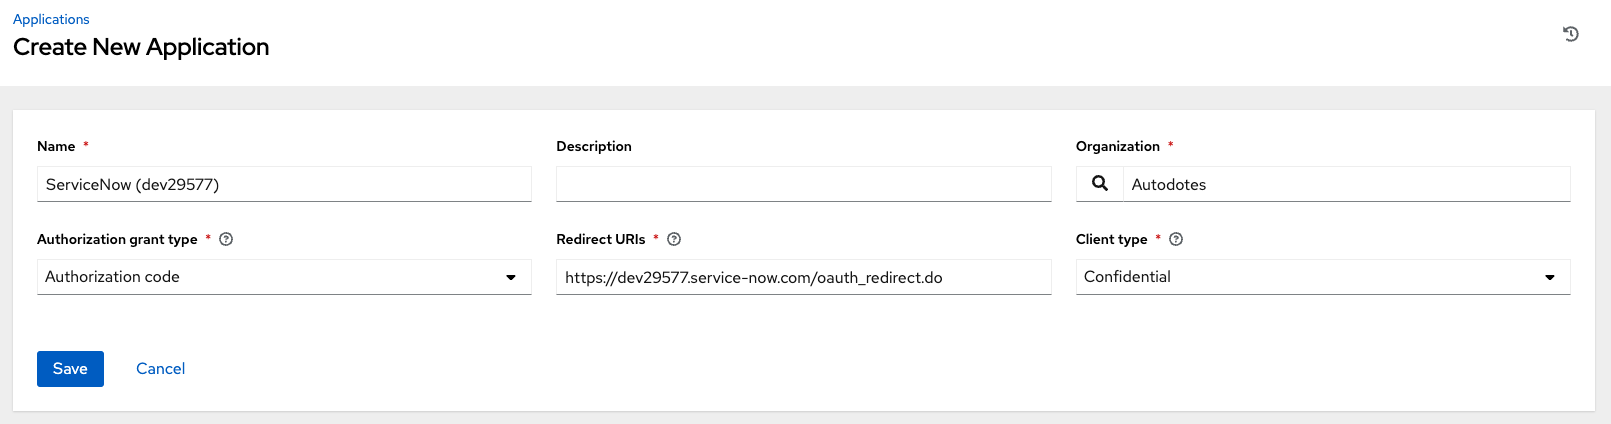
The first step will leverage the certified ansible.controller collection to create an application in Ansible Automation Platform for Service Now to leverage. We are going to specify the "authorization code" OAuth flow, per the Ansible documentation:
Authentication Methods
You can only use the authorization code type to acquire an access token when using an application. When integrating an external webapp with Ansible Tower, that webapp may need to create OAuth2 Tokens on behalf of users in that other webapp. Creating an application in Tower with the authorization code grant type is the preferred way to do this because:
- this allows an external application to obtain a token from Tower for a user, using their credentials
- compartmentalized tokens issued for a particular application allows those tokens to be easily managed (revoke all tokens associated with that application without having to revoke all tokens in the system, for example)
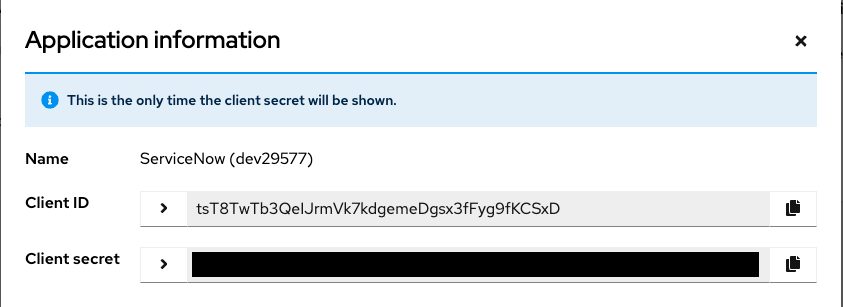
Capture the Application secret because you will need it for the Service Now OAuth resource.
Enable OAuth for External Users
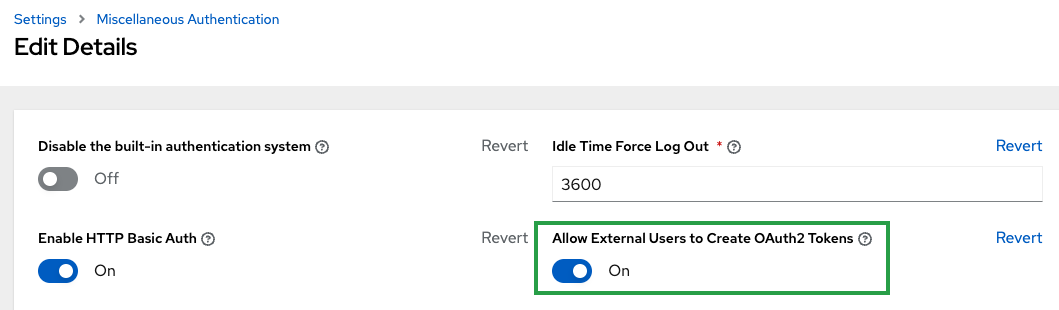
In order for the Service Now Application to create OAuth tokens on behalf of external users, you will need to enable this setting which is off by default.
Navigate to Settings -> Miscellaneous Authentication
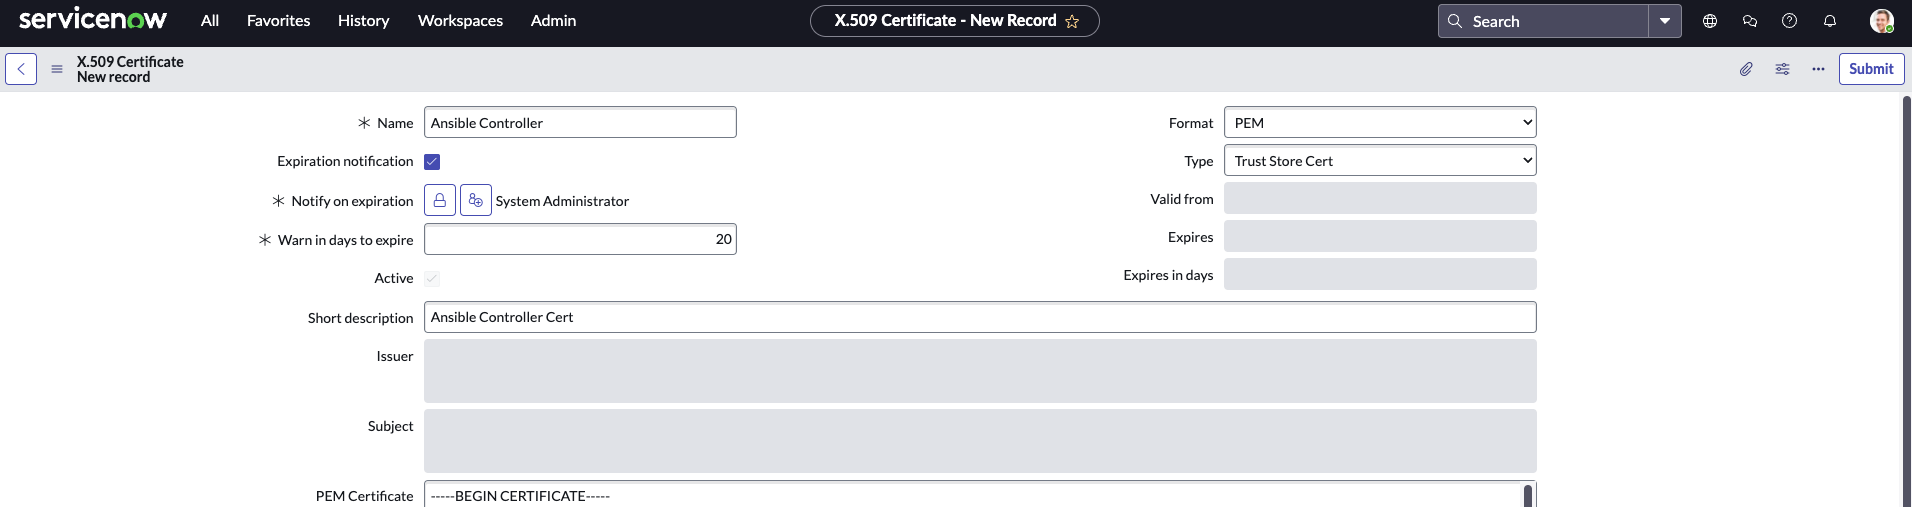
Add AAP Cert to Service Now Trust
Create an X509 Certificate in Service Now and upload the AAP Certificate. By default, the certificate can be found in /etc/tower/tower.cert.
Create Service Now OAuth Application
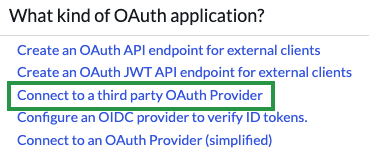
This application will be used to establish a connection to the AAP OAuth provider from Service Now. Navigate to Application Registry and click New -> Choose the Connect to a third party OAuth Provider type.
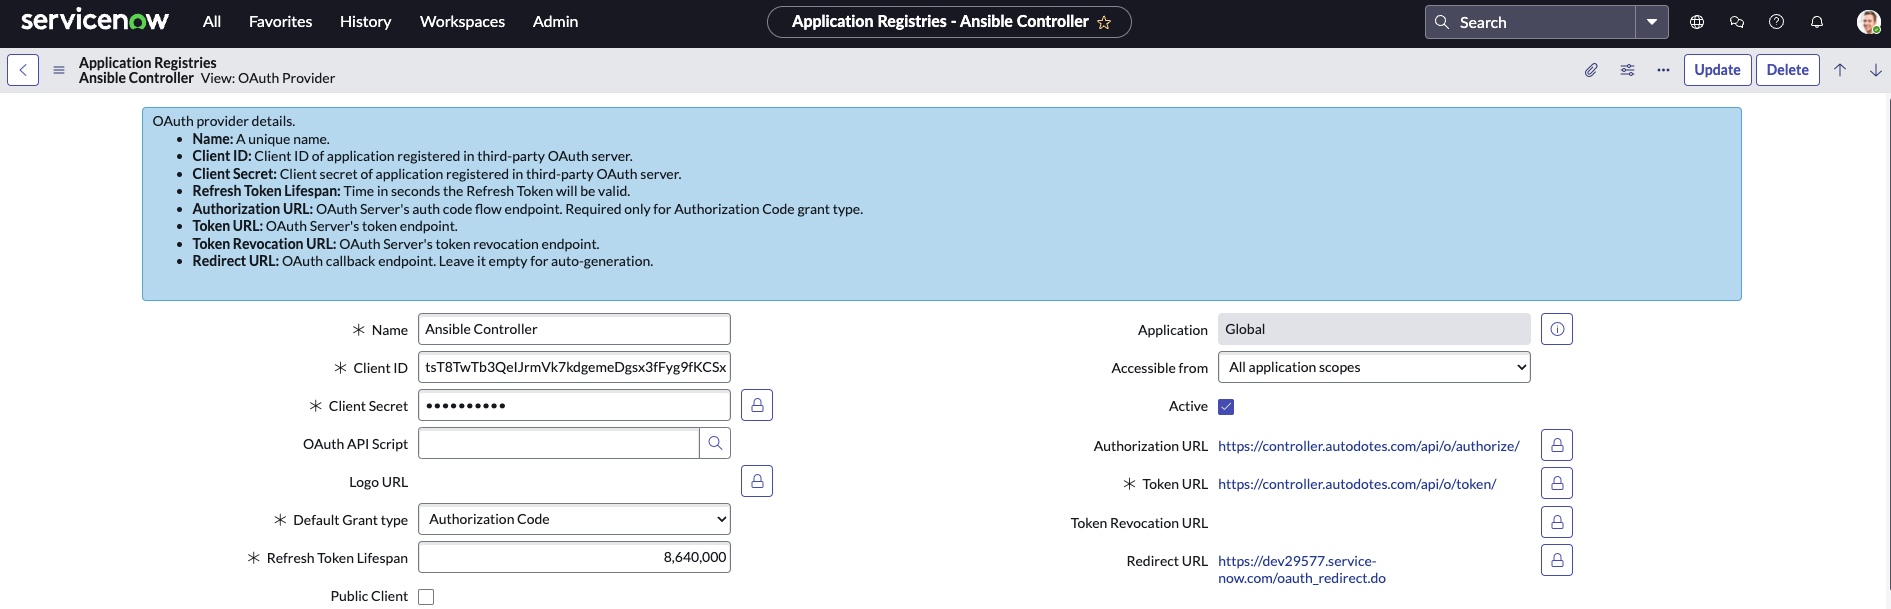
Fill in the details for the Application - see the table below for values to use:
| Field | Value |
|---|---|
| Name | Ansible Controller (or your preference) |
| Client ID | Value captured in Step 2 |
| Client Secret | Value captured in Step 2 |
| Default Grant Type | Authorization Code |
| Accessible from | All application scopes |
| Active | true |
| Authorization URL | https://{{ controller_host }}/api/o/authorize |
| Token URL | https://{{ controller_host }}/api/o/token |
| Redirect URL | https://{{ service_now_host }}/oauth_redirect.do |
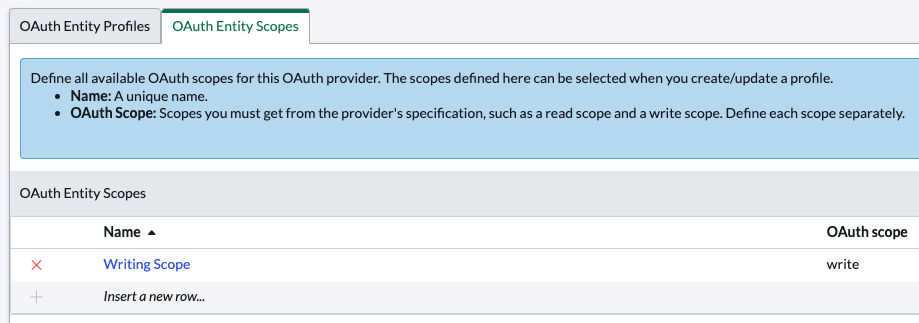
Create OAuth Entity Scope
The ServiceNow Application needs a defined scope to declare when requesting a token from AAP. For this, we will add a scope in the editor for our Application we just created. The Name, Ansible Controller Write, is arbitrary, but the scope is what will be requested. For the Controller API, populate the scope value with write.
OAuth Scopes
The OAuth Provider defines what scopes can be requested. In this case, the Controller API has a write scope that will allow us to launch job templates, workflow templates, etc.
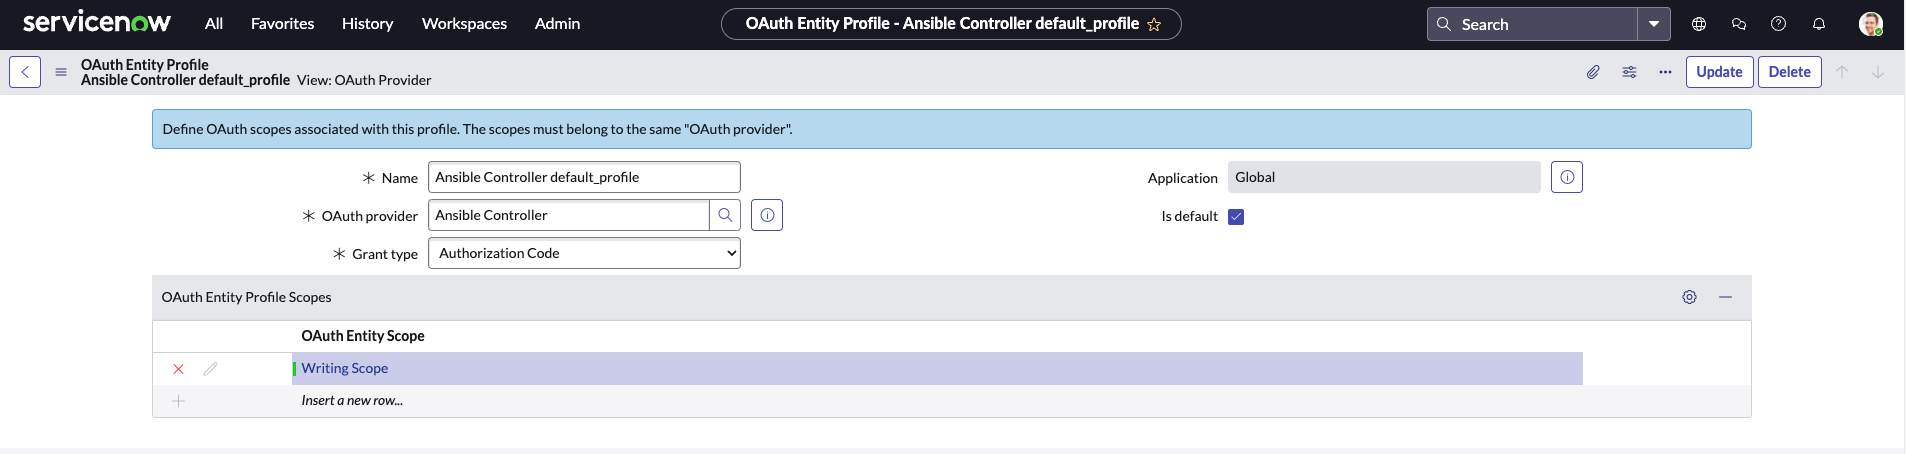
Create OAuth Entity Profile
Next, we will create an OAuth Profile for the Application. You can think of this as a wrapper around one or more scope(s). The Application is more flexible this way because it can be used with various profiles based on the scope required to complete an action. To keep it simple, we are just going to create an Ansible Controller Write Profile which uses the Ansible Controller Write scope we just created.
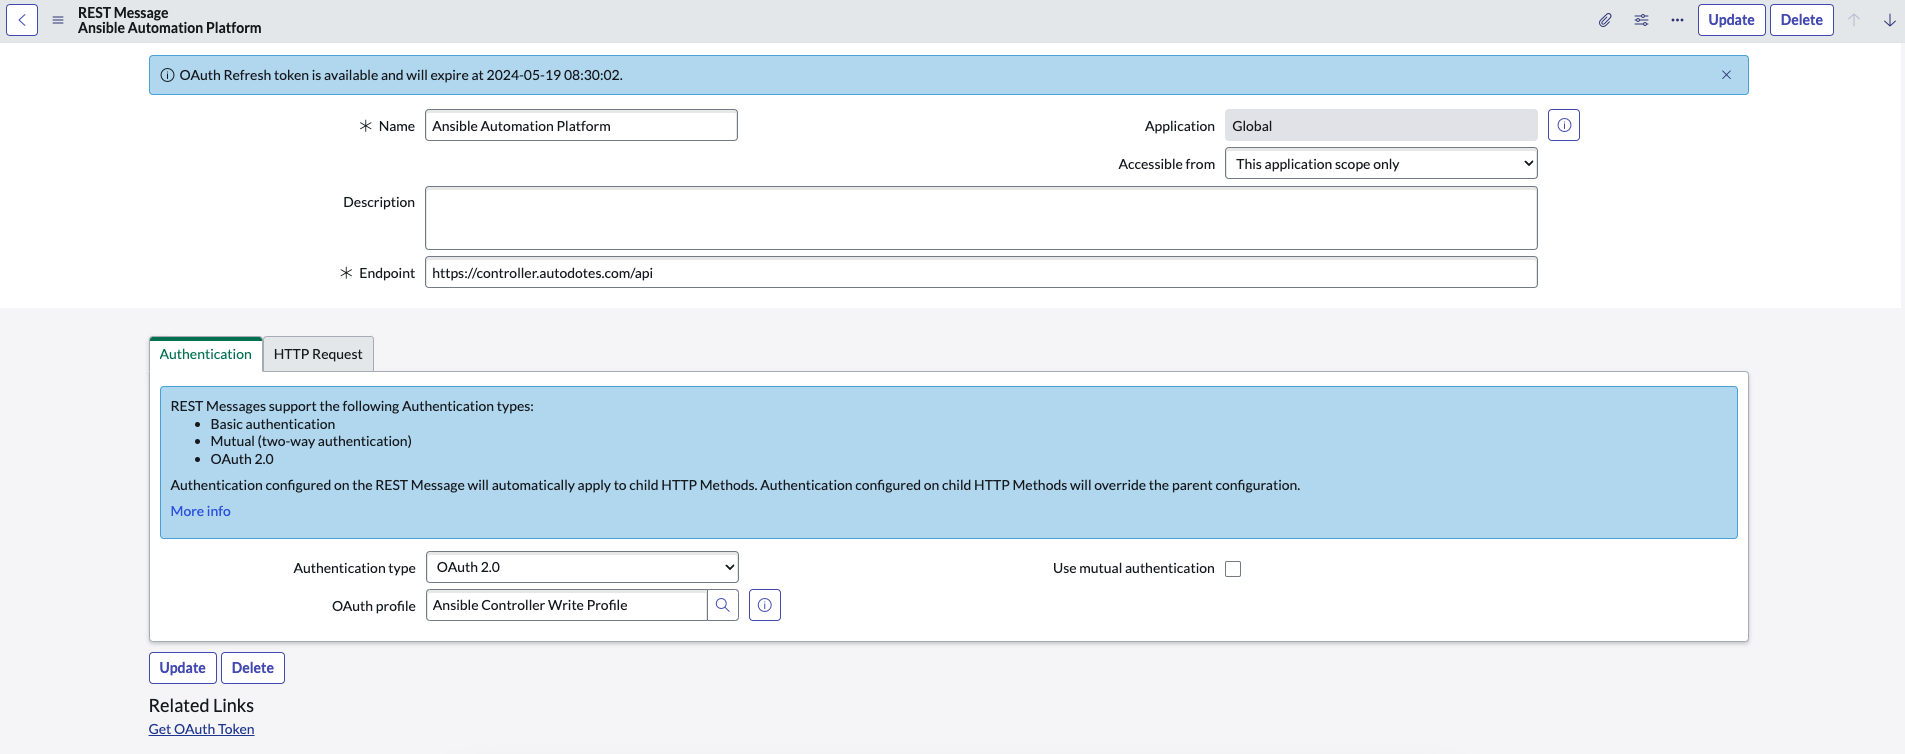
Create REST Message
In Service Now, the REST Message resource represents a particular REST API you plan to integrate with - in our case, the Ansible Controller API.
| Field | Value |
|---|---|
| Name | Ansible Controller API (or your preference) |
| Description | probably a good idea |
| Endpoint | https://{{ controller_host }}/api |
| Authentication: Authentication type | OAuth 2.0 |
| Authentication: OAuth profile | Ansible Controller Write Profile (or what you named it in this step) |
| HTTP Request: HTTP Headers: Content-Type | application/json ⚠️ (don't forget this) |
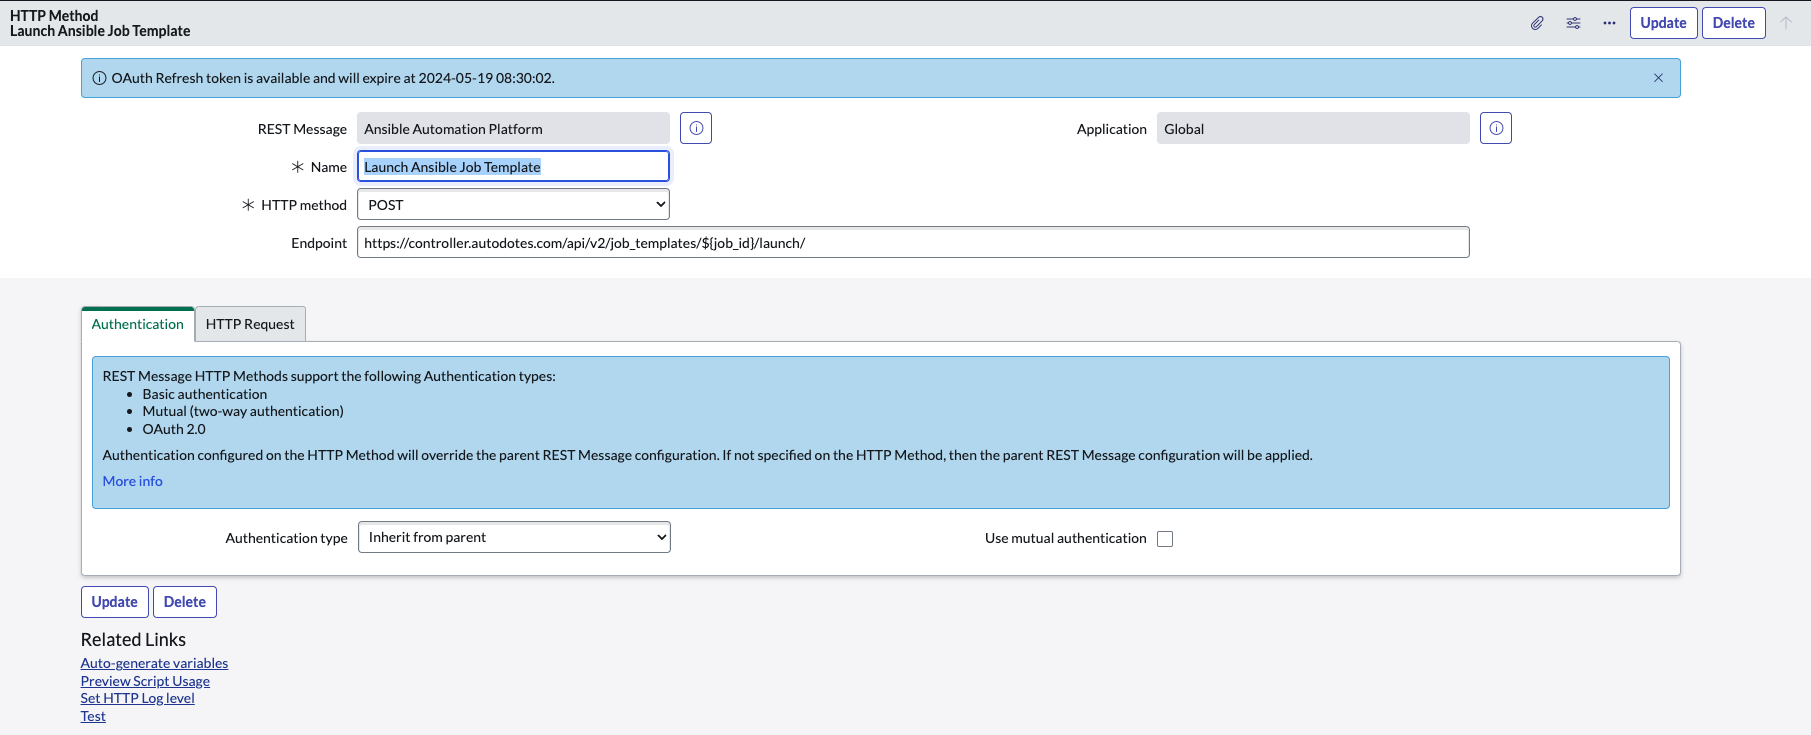
Create HTTP Method
The HTTP Method will represent a particular resource provided by the target API. You specify both the route and the method used when invoking this function. In the example below, I create a record for launching a job template. Keep in mind, you can very easily follow the same format to create a record for launching workflow templates.
| Field | Value |
|---|---|
| Name | Launch Ansible Job Template (or your preference) |
| HTTP method | POST |
| Endpoint | https://controller.autodotes.com/api/v2/job_templates/${job_id}/launch/ |
| Authentication: Authentication type | Inherit from parent |
Configure the HTTP Request
If you click on the HTTP Request tab, then you can configure the content sent as part of the request. This is useful for a job template because you can pass extra_vars and other prompted options. The value of content can include variables using the Service Now syntax - ${variable}.
Here is an example of my content:
{
  "extra_vars":   {
    "_hosts": "${decomm_host}",
    "_msg": "${decomm_message}",
    "ritm": "${decomm_ritm}",
    "cat_item": "${decomm_cat_item}",
    "requested_for": "${decomm_requested_for}",
    "sys_id": "${decomm_sys_id}"
  }
}
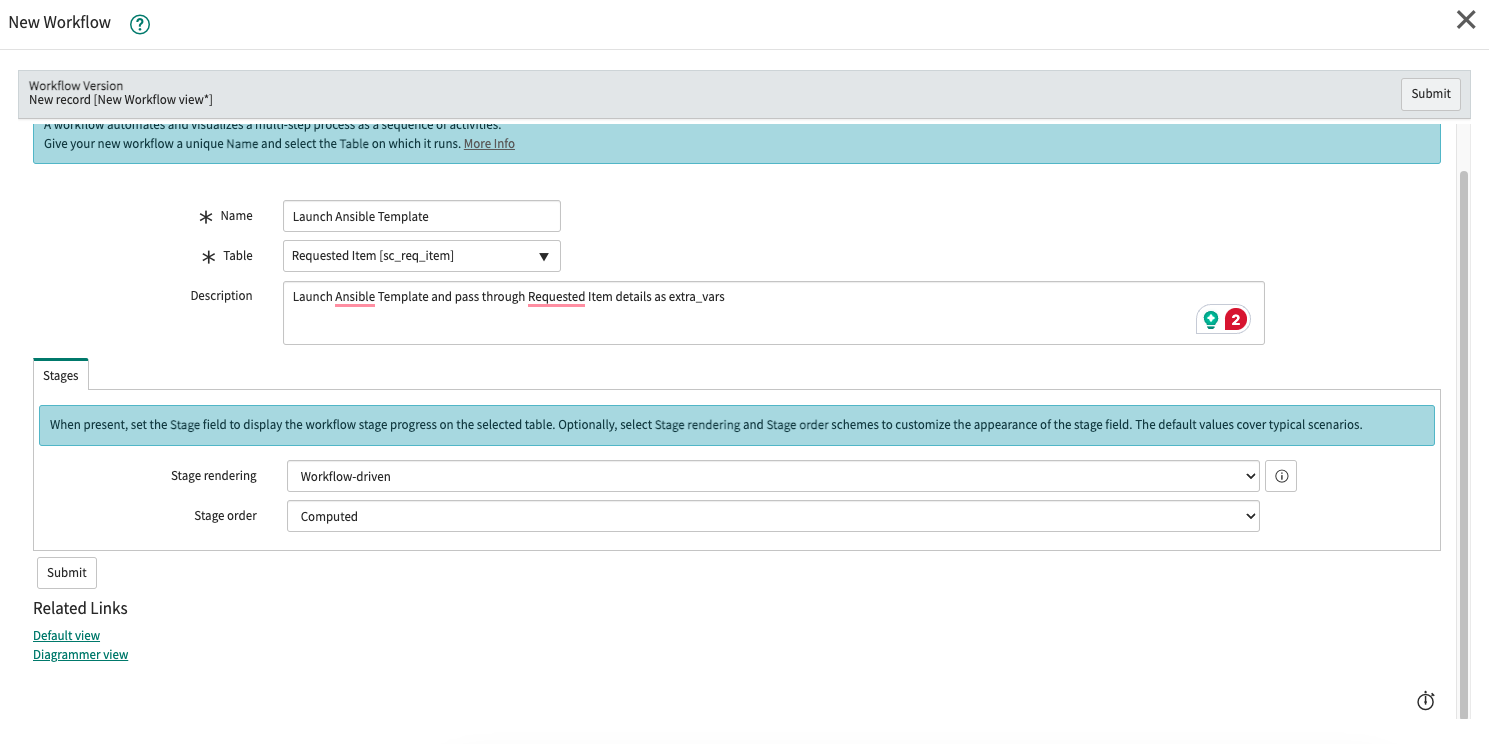
Create a Workflow
Navigate to the Workflow Editor and click New Workflow. This will open up a dialog to begin the process:
| Field | Value |
|---|---|
| Name | Launch Ansible Template (or your preference) |
| Table | Requested Item [sc_req_item] (just an example, you can trigger on whatever table you want) |
| Description | Launch Ansible Template and pass through Requested Item details as extra_vars |
After submitting, you will enter the designer where we are going to add a task to leverage the REST resources we configured earlier. On the right hand side, switch from the Workflows tab to the Core tab. You can then look under the Utilities folder or search for "Run Script". Drag the Run Script activity into the designer window which opens another dialog for configuring the Activity:
| Field | Value |
|---|---|
| Name | Call Controller API (or your preference) |
| Stage | (optional) |
| Script | Example (modify based on your setup) |
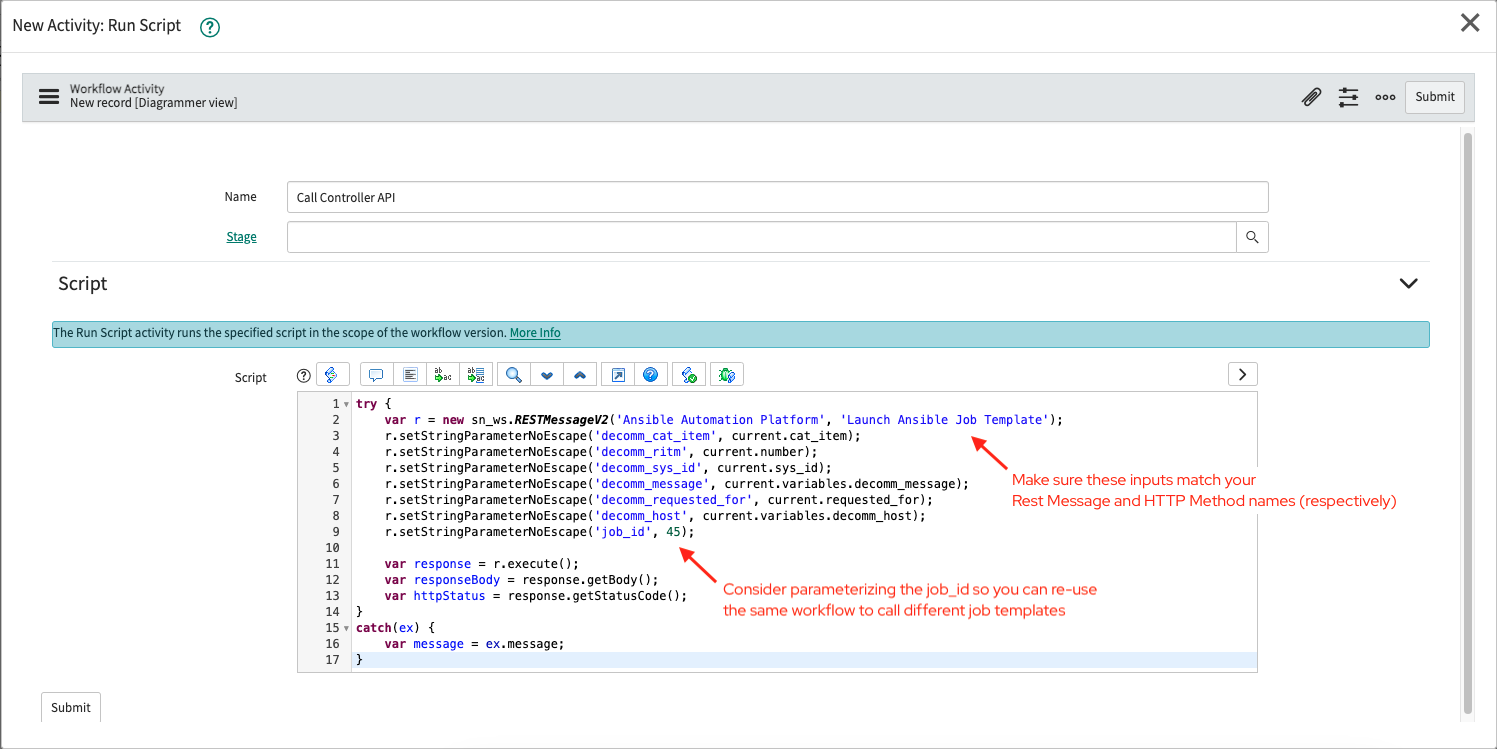
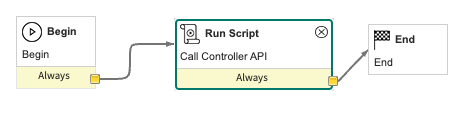
Make sure to hook the Run Script activity to the Begin/End blocks!
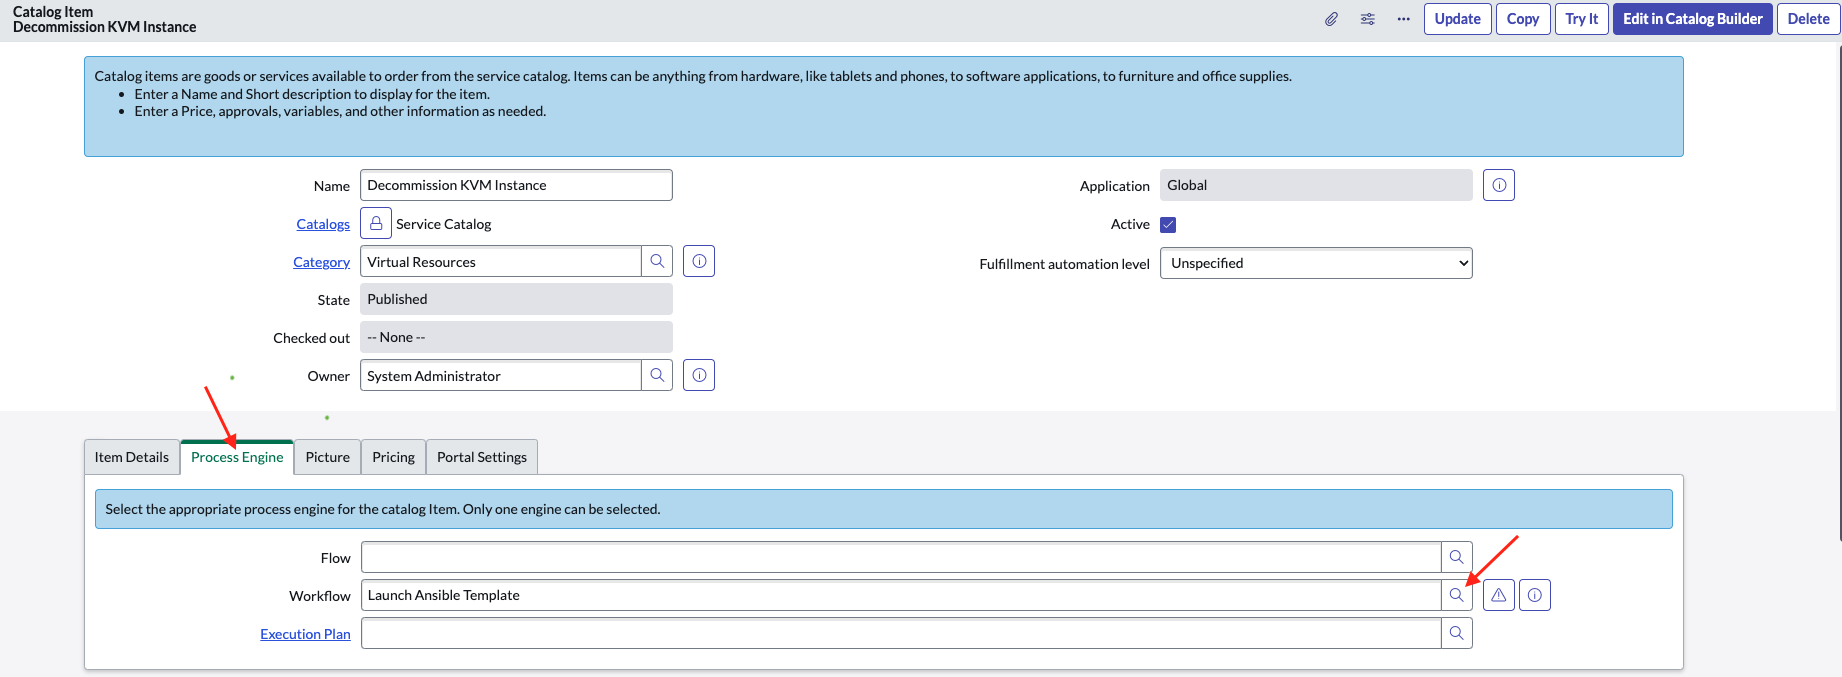
Connect Workflow to Catalog Item
The last step to wire everything together is defining the Process Engine for a Catalog Item you want to trigger and Ansible job. I have a demo Catalog Item for requesting a virtual machine, which accepts user input for the FQDN, purpose, etc. and passes the information along to Ansible. Once the Workflow is created, it's simple - open your Catalog Item in edit mode and highlight the Process Engine tab. Click the search icon on the Workflow input and your newly created Workflow should be available. That's it - whenever a customer submits a request for a new VM, the workflow will automatically kick off and spawn the appropriate Ansible job.